Thursday, March 10, 2011

Shane's second birthday party

Wow, it has been WAY too long sense I posted something.  I can't believe I let all this time go by.  Well enough wasting time, let's get to it.  My son Shane turned two on February 15, 2011 so I planned a party for him on the 19th.  I planned the party to be indoors but the temperature that day was 78 degrees so I had to move it outside.  The theme of the party was Bath time!  Let's start with the invite.
I used my gypsy to create the title with the "all mixed up" cart.  It has letters already in circles so I just welded them together staggering them to look like bubbles.  I cut them out of DCWV glitter paper which is now one of my new favorites.  The waves are also cut from the same paper just blue.  I can't remember where I got it from though.  The duck is cut from the "Wild card" cart.  I cut it twice.  Once out of orange card stock and once out of yellow.  I cut the beak off the yellow duck and layered the beakless yellow duck on top of the orange duck and Ta-da!! Then all I had to do was add wiggly eyes. 
The front the the invite said "Splish, Splash"  as you can see :)
The inside read "You are invited to Shane's bath time birthday bash" and then the place, time, date, etc.

Ok so next I did the same type of welding with the "all mixed up" cart for some more "bubble letter" decor.
The decor across the bottom of the table was supposed to go on a mirror in my kitchen.  When the party was moved outside I had to find a new place for them.
I used Shane's Fish & Splish boat by B.toys as a center piece that I filled with roses and "bubble 2's" on sticks.  The "filling it with flowers" idea I got from one of B.toys facebook fan photos. I wish I would have taken a close up of it.  I wish, looking back now, I would have taken more photos of my creations in general.
                               Rubber duck game                 
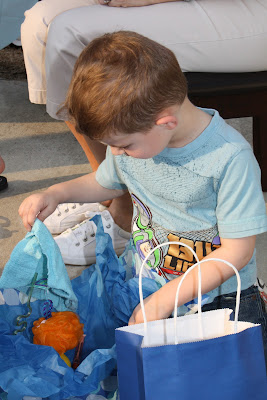
This is the same decor as on the table just cut smaller and taped to sticks.  In the boxes are bath time prizes for a game wrapped in tissue paper and tied with ribbon.  If you look behind the "N" in Shane you can see part of an upside down "7" on an orange tag.  I made these tags from the "all mixed up" cart also I just didn't take a picture.  Each prize is labeled with a number tag 1-12.  Each rubber duck in the tub are numbered 1-12 also.  Each kid got to pick two ducks to result in two prizes per child.  The prizes were colored bath fizzes,  bath fizzy dino eggs,  bath finger paints and bath markers.
These were a big hit.


Well that was it for crafts but I want to Share a little more info about the party.  For favors each kid got a gift bag that consisted of loufas, bubbles, washcloth, twisty straw, and a rubber duck. 

Other activites I had for the kids were play-dough (yellow, orange and blue) to make ducks and water.  A bubble machine was also going. I also had a bath time CD playing from the car radio and white helum balloons all over to look like bubbles.


This party was a lot of fun to plan and ever more fun for the kids to enjoy.

Monday, October 25, 2010

The party is over!!

Hey everyone!! I'm back.  My husband has this week off from work so I may be able to get a little crafting time in.  For now I'm going to share with you the Halloween party projects I completed and used in the party I hosted this past weekend. 


First off...the party sign.  The party was in our back yard so I wanted to make a sign telling guests where to go to get into our fence.  I had two of the neighbor girls over before the party so they could help out. I just noticed in the picture that one of the ears is missing off the cat...oops I just took this picture though and I'm pretty sure it was there when it was up for the party.  Anyway... the girls picked out the cat which is from the Mini Monsters cartridge.  I used my new gypsy for the first time to make the title with the gypsy font.  I cut the arrow out by hand.  I believe the "Happy Halloween" was from the Wild card cart but I'm not positive.  The candy paper is from K&Company and I love that paper pack.  The card stock was from a pack I got at Michael's.


Next...The grave yard cake. I made the fence to go around the cake with the Mini Monsters cart.  I cut out 10 pieces at 3 inches but I had to cut a couple sections off to make it fit.  I glued tooth picks to the back of some of the posts to poke into the cake.
Hint: if you try this, with a double layer cake the full tooth pick will work but with a single layer you have to cut the tooth pick in half.

That is the only paper part of the cake.  Click for directions on the crunchy spiders.  I changed mine a little and did white chocolate eyes and mini chocolate chips mixed in the "batter" (I'm not sure what to call it)  The Mummies are just white chocolate covered strawberries but I covered them "messy"  The graves are pepperidge farm milano cookies I wrote on with black gel. The rats or normaly mice for Christmas but I thought I'd make them for a grave yard.  The link for that is what I did, however I did know how to make these already so that is not where I got the idea from. 
Here's another picture of the spiders and I also made a sign.
The spider paper was out of the same stack as the candy paper from K&Company.  The letters were cut from the plantin schoolbook cartridge italic and I ripped a piece of velum to go under the letters so they would show up better.

The rotten apple punch sign was made with the same papers as the others. Plantin schoolbook cart was used for the font which was roly poly and the apple was cut from serenade. I cut it in brown to make it look rotten.  I outlined it with a white paint pen. The worm was from Create a Critter and the grass was too but it was with the alligator.


I made a sign for my "Boo mix"
(prezels, ghost shaped mini marshmellows, reeses peices, cinnamon chex and chocolate chips)
Hint: Don't add the prezels until ready to eat because they suck the moisture from the marshmellows making the prezels rubbery and the marshmellows hard...I learned the hard way.
using Mini monsters for the Boo and I cut off the "!" and hand cut a shadow.  The font was plantin schoolbook again. 
I also made a "Pin the nose on the pumpkin" which I cut from the Paper Doll Dress-up Cart.  Instead of cutting the pumpkin out several times to get extra noses I traced the orange nose and cut six out by hand. I placed number stickers on each and used double sided tape on the back. This pumpkin was cut using fit to page on a 12 by 12 mat.
Well that's it for tonight!! Thanks to you all for stopping by.  I am now falling asleep. :)
Enjoy and I hope you stop by again real soon!!

Wednesday, October 20, 2010

My first post...

Hi everyone!! Today is the the day!! I'm posting something.  I'm not sure what yet though. lol I'm hoping I come up with something while I type.  AH HA!! I will post a project I made for the Halloween party I am hosting this coming Saturday.
Ok here it is.....
They are center pieces for the tables at the party. I used my cricut expression to make the paper figures. I bought the pails at target for a dollar.          
HINT: The pails are not filled all the way with candy corn. I placed a crumpled up paper towel in the bottom of each pail .
 The paper figures are taped to chenille stems that I wrapped around pencils for the kids to take home. I used the Paper doll dress up cartridge to make all the figures.  I have made many more projects for the party but I am waiting for the party to take pictures.  Come back again soon to see what's next :).
Thanks!!